This is a sponsored conversation written by me on behalf of Cricut. The opinions and text are all mine.
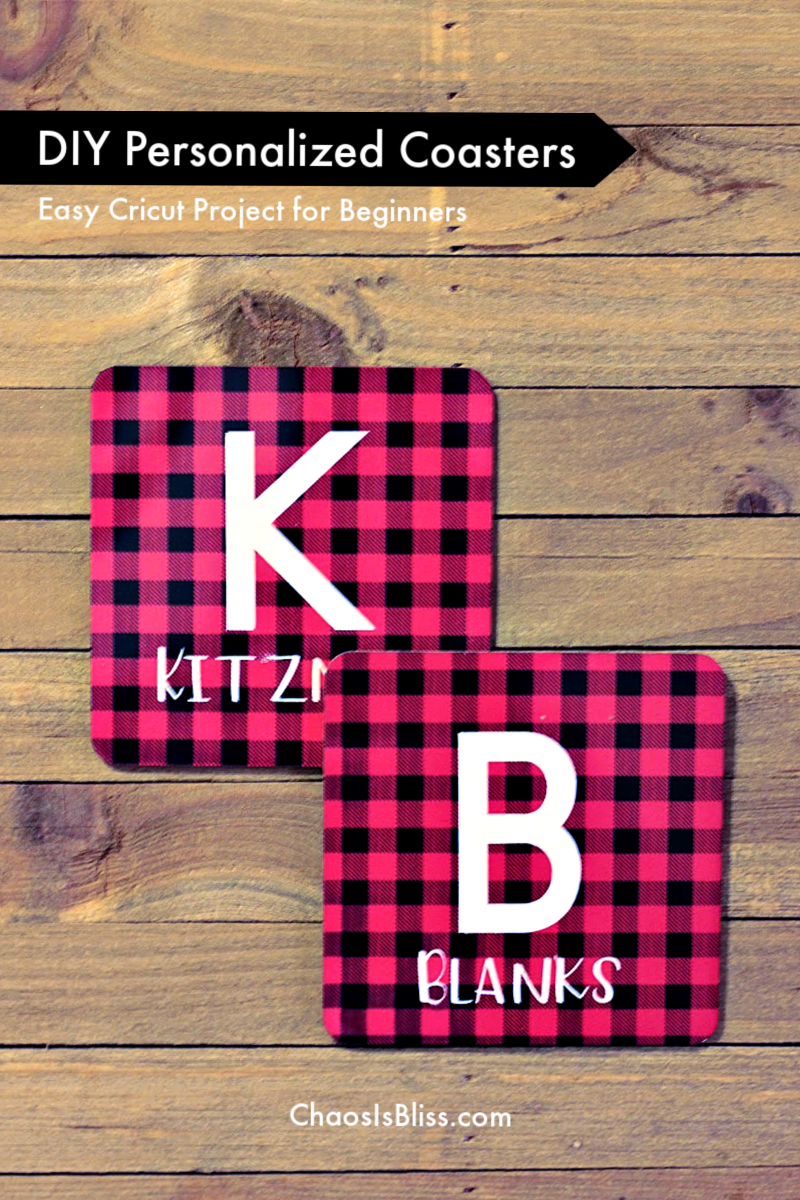
Make these DIY personalized coasters when you need a teacher gift (or for anyone!) – it’s another easy Cricut project for beginners using the Explore Air 2 and EasyPress 2!
I still consider myself a Cricut beginner. I’ve made 4 easy Cricut projects so far, trying my hand at paper cutting, iron-on vinyl onto a pillow, then I made my very first T-shirt.
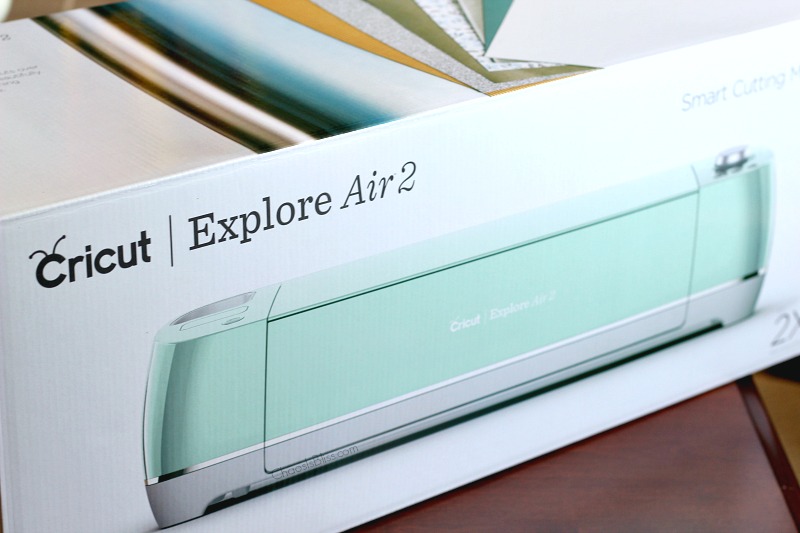
Receiving my Explore Air 2 was like Christmas in October!
In order to fully submerge myself into the full Cricut experience, it was time to try one of their newer products, the Infusible Ink system.
But let me tell you first, what I’m loving about everything I’m learning in the world of Cricut.
5 Things I love about my Cricut Explore Air 2
- First off, I have been ah-mazed at how easy it is to use a Cricut machine. I am a busy, working mom who tends to procrastinate, thinking I have much more time for any task than I actually do. So the night before the last day of school before winter break, I decided was the perfect time to give Cricut’s Infusible Ink Transfer Sheets a try. More on that in a bit.
- Two words: Design Space. This is a follow-up to #1. Design Space is the built-in app you’ll use to create your design. It will also hold your hand through the cutting process, prompting you with what to do next for each step.
- Cricut Access – love this membership! If you are a serious maker (or a wannabe), invest in the small monthly fee to have access to hundreds of fonts and 100,000+ images (many licensed brands!). Without Cricut Access, never fear – you still have gobs of free images available in Design Space.
- I love alllll the options for materials that can be used on an Explore Air 2! From vinyl to leather and everything in between, there is no end to what you can create. Cricut has a blog you can follow for even more ideas and inspiration.
- The Explore Air 2 is an investment, for sure – but I love that it will bring me years of creatively designing gifts, home decor, apparel and more that won’t look like it was unboxed from a box store. This personalized coaster project made a sweet gift for two teachers, and aside from the gift card we added, cost less than $7 each in supplies after splitting the Coaster 4-pack and Infusible Ink Transfer Sheets into four separate gifts.
DIY Personalized Coasters
I made these using my Explore Air 2, EasyPress 2 and EasyPress Mat.
Materials needed:
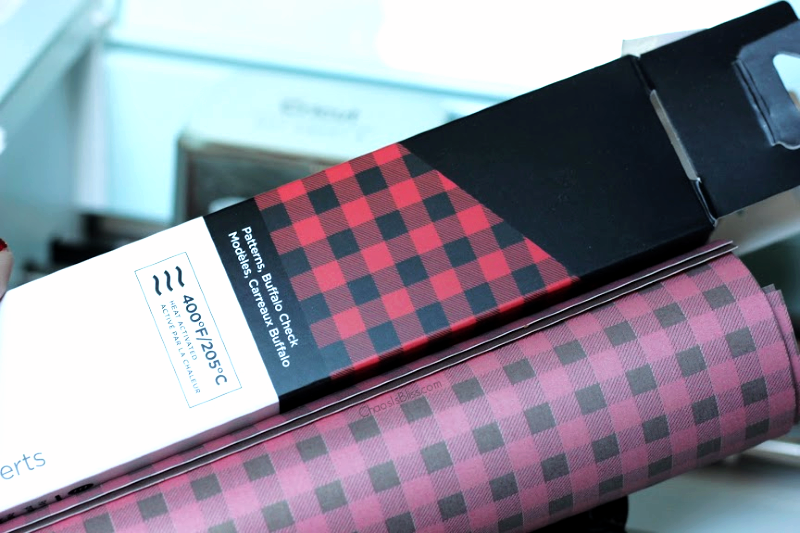
- Infusible Ink Transfer Sheets in the pattern or color you like
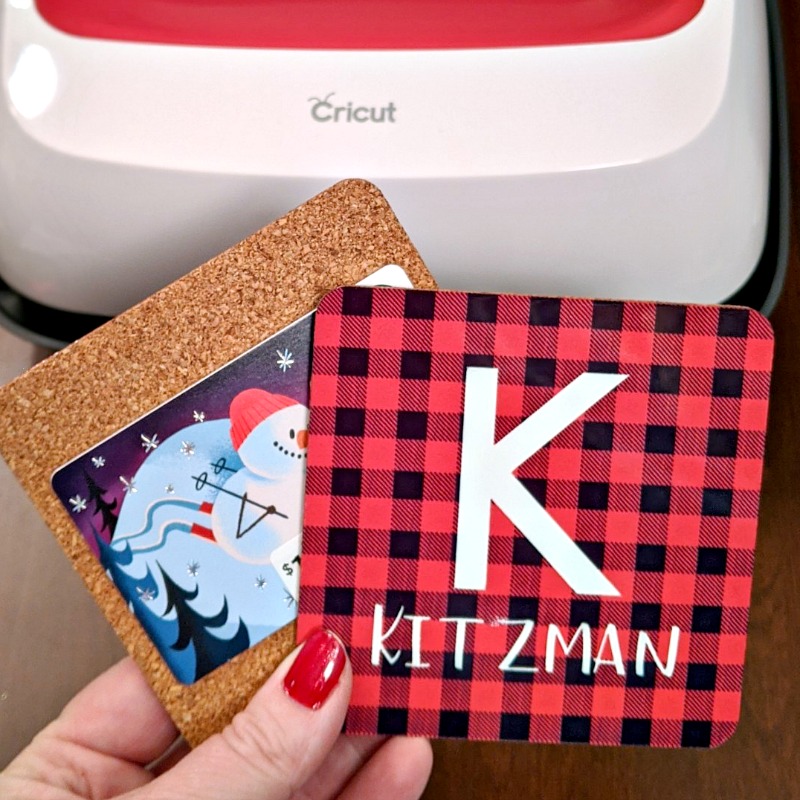
- Infusible Ink Coasters
- Cardstock, 1 sheet
- Butcher paper, 1 sheet (included in Infusible Ink Transfer Sheets package!)
- Heat Resistant Tape
- Lint roller
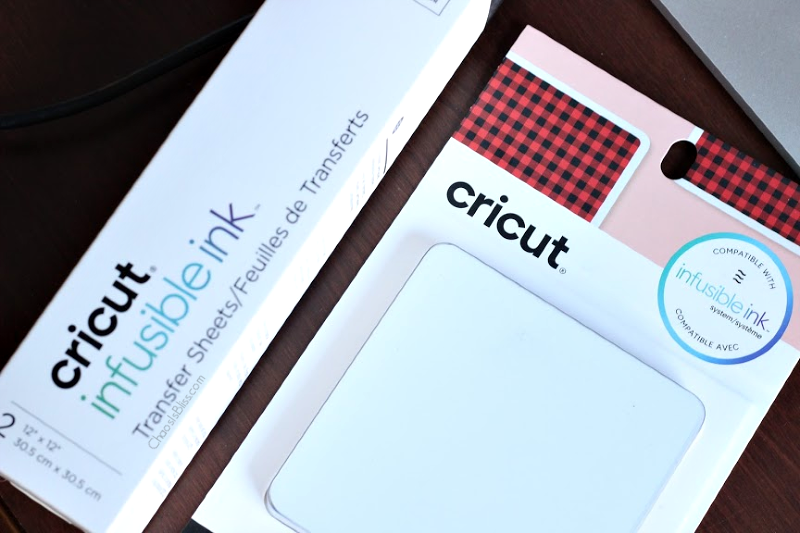
Cricut’s Infusible Ink system seamlessly infuses the colors and patterns into your base material so it is one and the same. It is truly unique and a game changer in the home crafting field!
Tips when using Infusible Ink
I have a few tips to share when using Infusible Ink for the first time. As a beginner myself, I read Cricut’s FAQs and watched a few videos to learn first before getting started.
First, note the difference between the bold colors on the package and what’s inside. Trust the system! It will look gorgeous and vibrant when applied to your base material using the EasyPress.
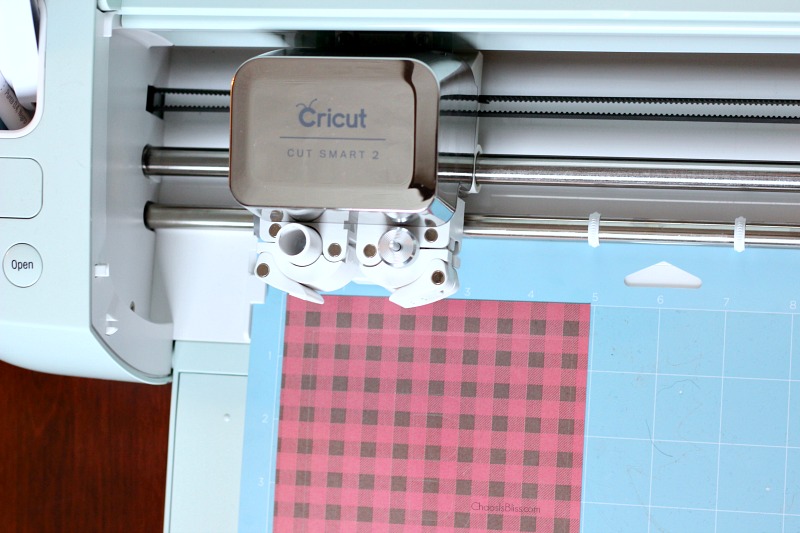
Second … on the Explore Air 2, you will want to move the dial to “Custom” and Design Space will show a list of available materials – select Infusible Ink, and the blade will cut appropriately. The first time I tried cutting my Infusible Ink I had left the dial on “Iron-On” and the blade didn’t cut all the way through.
And my last tip is to take caution to WAIT several minutes for your project to cool off after applying the EasyPress. The coasters include a warning on the package for a reason. Use those few minutes to dream of your next project!
Let’s make coasters!
Using Design Press, create your layout. The Infusible Ink Coasters I chose are 4 1/4″ square, and because I wanted my design to bleed around every edge, I made squares that were slightly larger than the coaster.
What you do next is up to you! Import an image from the thousands built-in to Design Space, upload your own, or simply use text as I did for our personalized teacher gifts.
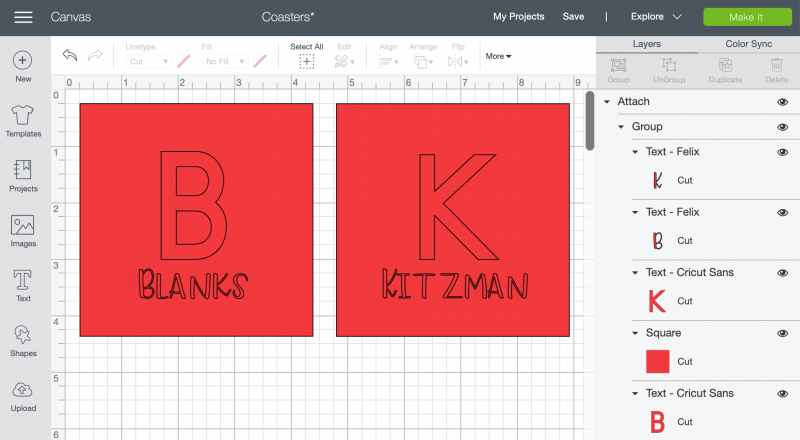
Because I wanted so much of the Buffalo Plaid pattern to be shown, my design is in reverse – so I will weed out the large initial and the last name so the white background of the coaster will be shown.
Now it’s time to cut!
Applying Infusible Ink
After creating your design in DesignSpace and cutting with your Explore Air 2, it’s time to apply the Infusible Ink transfer sheet to your coaster.
Layer as follows, bottom to top:
- EasyPress Mat
- Cardstock
- Coaster, cork side down and shiny side up
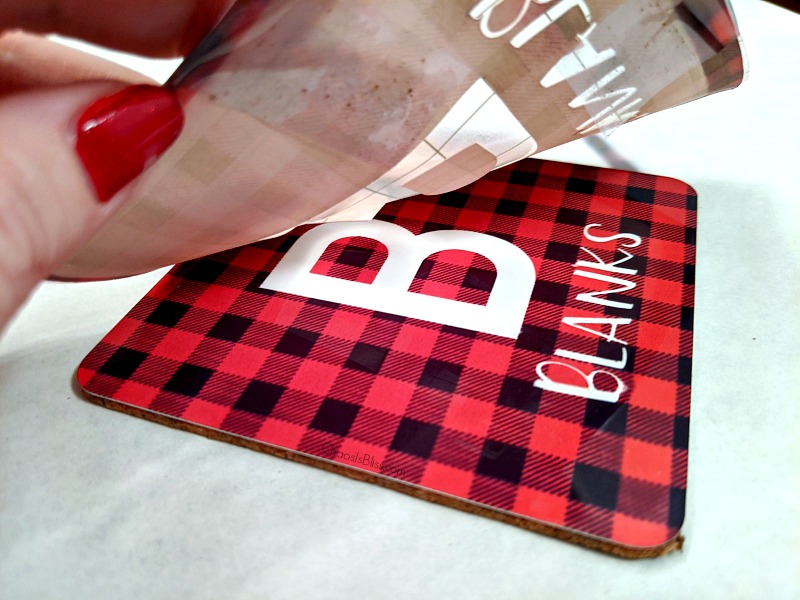
- Your cut and weeded design (mirror if using text), face down on the top of the coaster. Use Heat Resistant Tape to keep the design right where you want it on the coaster.
- Butcher paper
Follow the EasyPress Heat Guide for temperature and length of time. I used 400° for 60 seconds. Place the heated EasyPress on your design and gently let go – no need to press – and set the timer. When the time is up, gently lift up the EasyPress so as not to disturb the coaster.
Let cool completely before removing tape and checking your beautiful finished coaster!
I made one for each of my youngest daughter’s two teachers, and attached a gift card to the back so they could enjoy a coffee treat on their winter break. I really hope they like it!
The next time you want a clever and personalized gift for a teacher, neighbor or friend … give this easy Cricut project a try! You’ll find it on Design Space through this link.
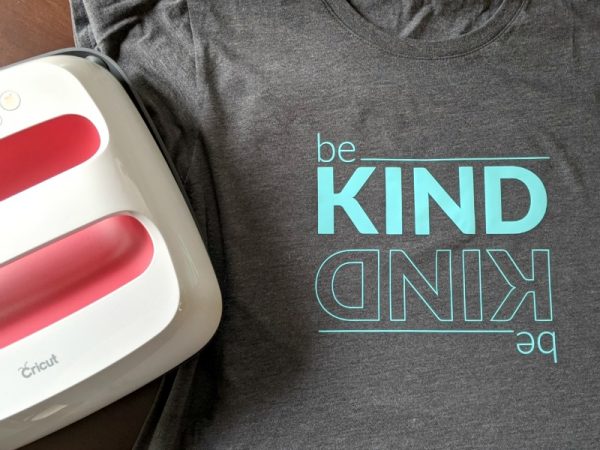
Also be sure to check out how to make a Be Kind T-shirt, also using the Explore Air 2 and EasyPress 2!


 I love sharing ways to spend less, so families can do more! My passions are cooking, late night TV and being amused by my witty husband and three kids.
Leave a Reply